

Remember when a jar of pickles didn’t need three tools to open? When your grandmother fixed a stubborn stain with something already sitting in the fridge? Life used to run on simple tricks. No apps. No gadgets. Just a little know-how passed down the family line, one kitchen table at a time.
Somewhere along the way, we traded those tricks for gizmos we barely use. Our cupboards filled up with single-purpose tools we forget we own. Our patience for instruction manuals ran thin. And the old wisdom got quietly packed away in a drawer, right next to the twist ties and the good scissors, waiting for someone to remember it.
It’s time to bring it back. These seven hacks ask for almost nothing. No special trip to the store. No fine print. Just items already sitting in your kitchen or your junk drawer. Each one solves a real headache. A wobbly vase. A stubborn ink stain. A stuck glass that won’t budge no matter how hard you pull. Sound familiar? Keep reading. Every page ahead hands you one simple fix, straight from the generation that never needed a manual. Your hands will thank you. So will your wallet.

The Sturdy Vase Trick
Ever set a vase of fresh flowers on the table, only to watch it tip over the second someone walks by? Tall vases are notorious for this. A few stems lean one way, and the whole thing goes down, water and all. It’s a mess nobody has time to clean up twice in one week, especially with good flowers going to waste on the floor.
The fix takes seconds. Pour a layer of sand into the bottom of the vase before you add water and flowers. The extra weight sits low and holds the base firmly in place. Wind from an open window won’t budge it. A curious pet brushing past won’t knock it over either. Even a heavy bouquet leaning to one side stays perfectly upright.
You don’t need special craft sand from a store. A cup or two from an old sandbox, a bag from the hardware aisle, even fine gravel will do the job nicely. Rinse it first so the water stays clear. Then let your flowers stand tall without wobbling. This one small step means fewer spills, fewer broken vases, and a lot less frustration on your kitchen table.
The Milk Ink Remover
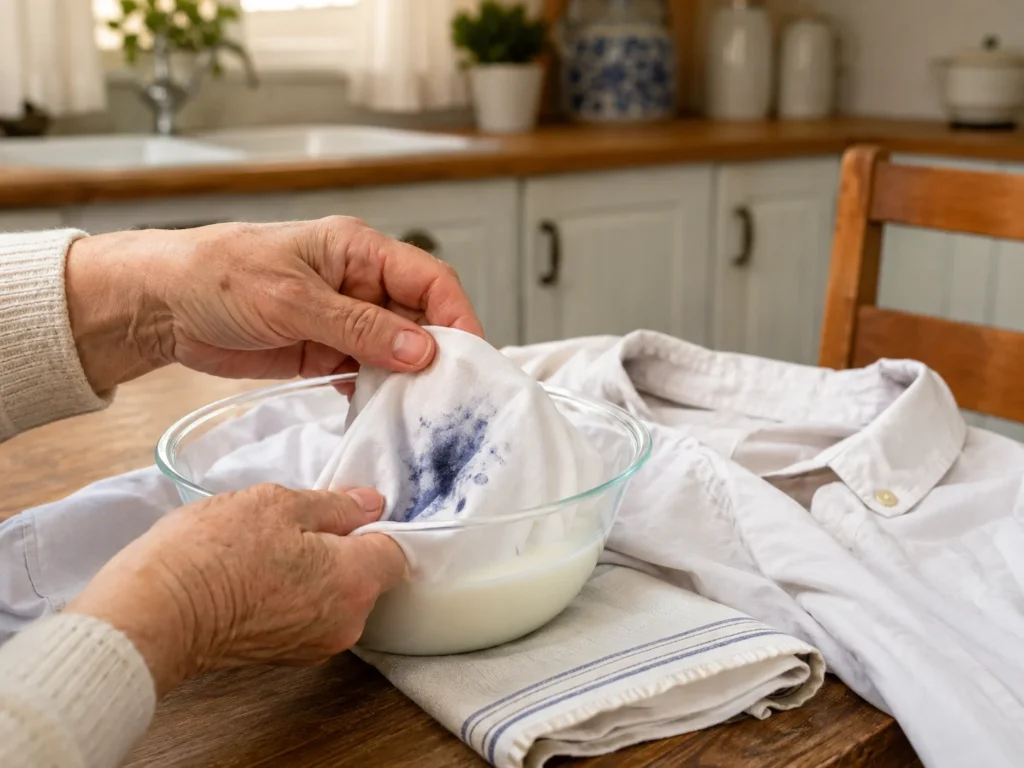
An ink stain on your favorite blouse feels like a small disaster. You scrub it. You dab it. Sometimes you make it worse and watch the mark spread further into the fabric than it started. Store-bought stain removers promise miracles but often just fade the color around the stain instead of lifting it out.
Reach for the milk in your fridge instead. Soak the stained section in a small bowl of milk for a few hours, or even overnight for stubborn marks that won’t let go. The proteins in milk work gently on the ink, drawing it out of the fibers without harsh chemicals or scrubbing. Rinse with cool water afterward, then wash the item as usual.
This trick works especially well on cotton and other natural fabrics. It’s gentle enough for delicate blouses, yet effective enough for a favorite shirt cuff caught by a leaky pen. No trip to the store. No expensive spray. Just something already sitting in your refrigerator door, ready to save the day and your wardrobe in one simple soak.
The Soda Pop Level
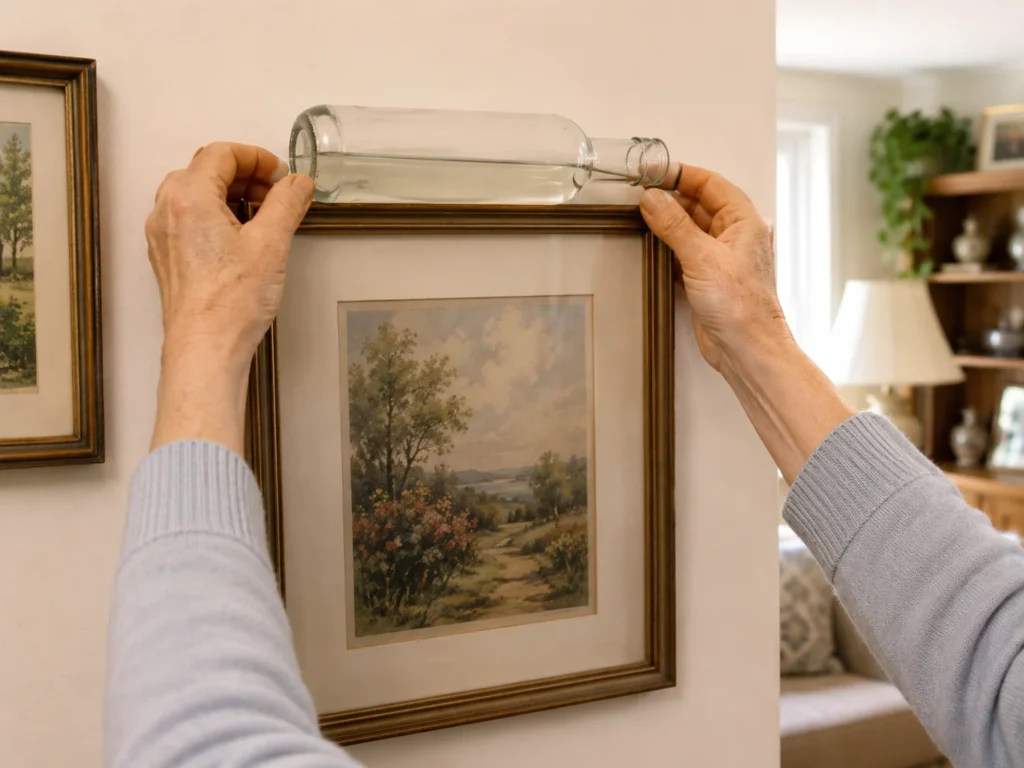
Crooked pictures have a habit of catching your eye every time you enter the room. Straightening them by guesswork can become a repeated nuisance. You step back, tilt your head, adjust the frame, and discover it still looks wrong.
Grab a clear soda bottle instead. Fill it about three-quarters full with water so that there is a visible, even liquid line along the top of the frame. Now hold the bottle sideways along the top frame of the painting, and adjust the picture to match until the liquid line is straight. This is especially handy when your proper level is in the garage, missing, or simply too tedious to fetch.
Any clear bottle with a bit of air space will do the job, so keep one handy in the kitchen. Only, remember to put on a tight lid or hold the mouth of the bottle so that there is no leakage or unnecessary spills. Next time a frame needs hanging, or a shelf needs mounting, skip the search through your toolbox. Your soda bottle is quietly waiting to help you get it right the first time.
The Glass Loosener
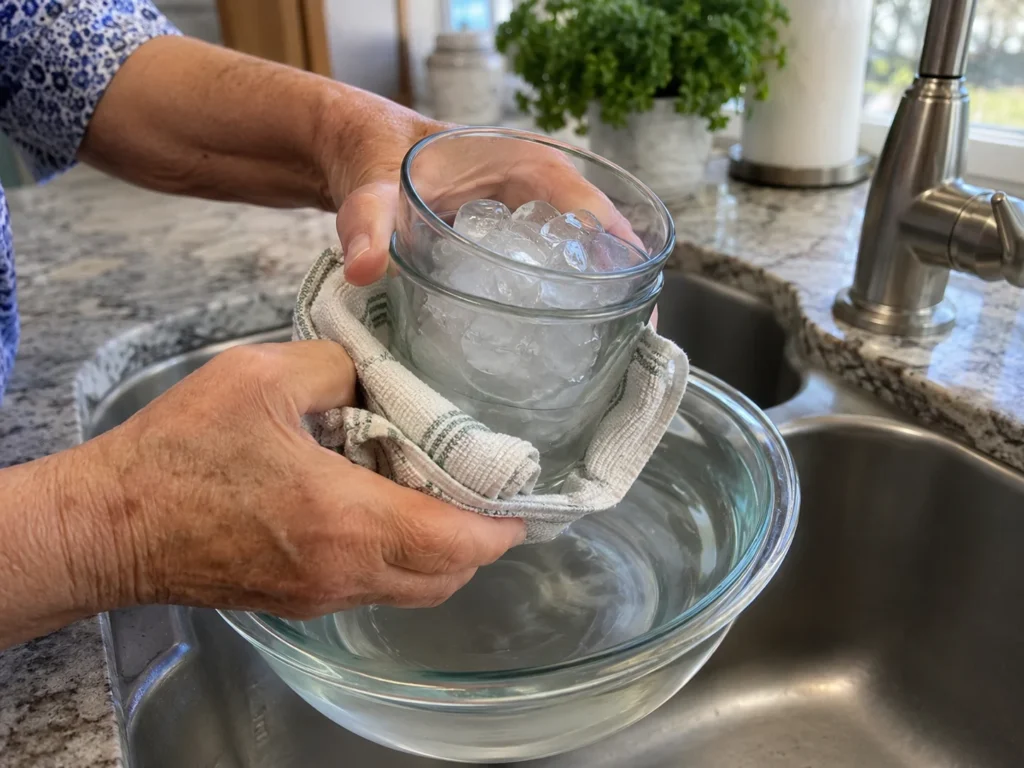
Two drinking glasses stacked together and stuck fast is a familiar kitchen headache. You pull, you twist, you worry one might shatter in your hands. The harder you try, the more stuck they seem to get, and now you’re afraid to even touch them.
Here’s the gentle way out. Fill the top glass with ice water and let it sit for a minute. Then dip the bottom glass into a bowl of hot water, being careful to keep your hands clear of the heat. The outer glass expands slightly from the warmth. The inner glass contracts from the cold. That tiny difference in size is all it takes, and the glasses slide apart with barely a tug.
No pulling. No twisting. No risk of a shattered glass or a cut hand. Just hot water, cold water, and a minute of patience. It’s the kind of trick that feels like magic the first time you try it, yet it’s simple physics doing all the work behind the scenes. Keep this one in your back pocket for the next kitchen mishap.
The Rice Bottle Cleaner
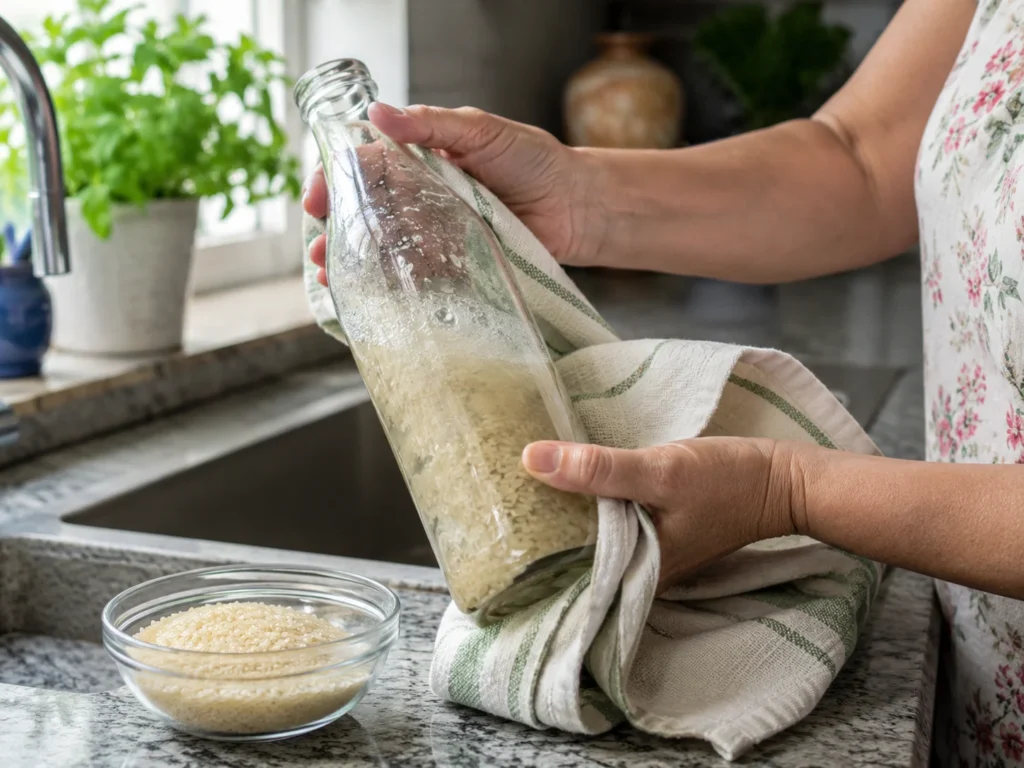
Cleaning the inside of a narrow bottle is nearly impossible with a sponge. Your hand won’t fit. A bottle brush only reaches so far down. Grime and residue cling to the bottom no matter how much you scrub from the outside, leaving you ready to just toss the whole thing.
Try this instead. Pour a spoonful of rice into the bottle along with a splash of warm water and a drop of dish soap. Cover the opening with your hand and give it a vigorous shake. The rice grains act as tiny scrubbers, working their way into every corner and loosening buildup a sponge could never reach. Rinse thoroughly afterward, and the inside comes out spotless.
This trick works wonders on vases, thermoses, and glass bottles you’ve been meaning to reuse. A small funnel makes pouring the rice in even easier and less messy. No special brush required, no wasted money on tools that only work for one shape of bottle. Just rice, soap, water, and a little shake to get the job done right.
The Windproof Match
Lighting a candle or a campfire on a breezy day can turn into a real struggle. You strike match after match, only to watch each flame flicker out before it catches anything. It’s frustrating, and it wastes matches fast, especially when you’re down to your last few.
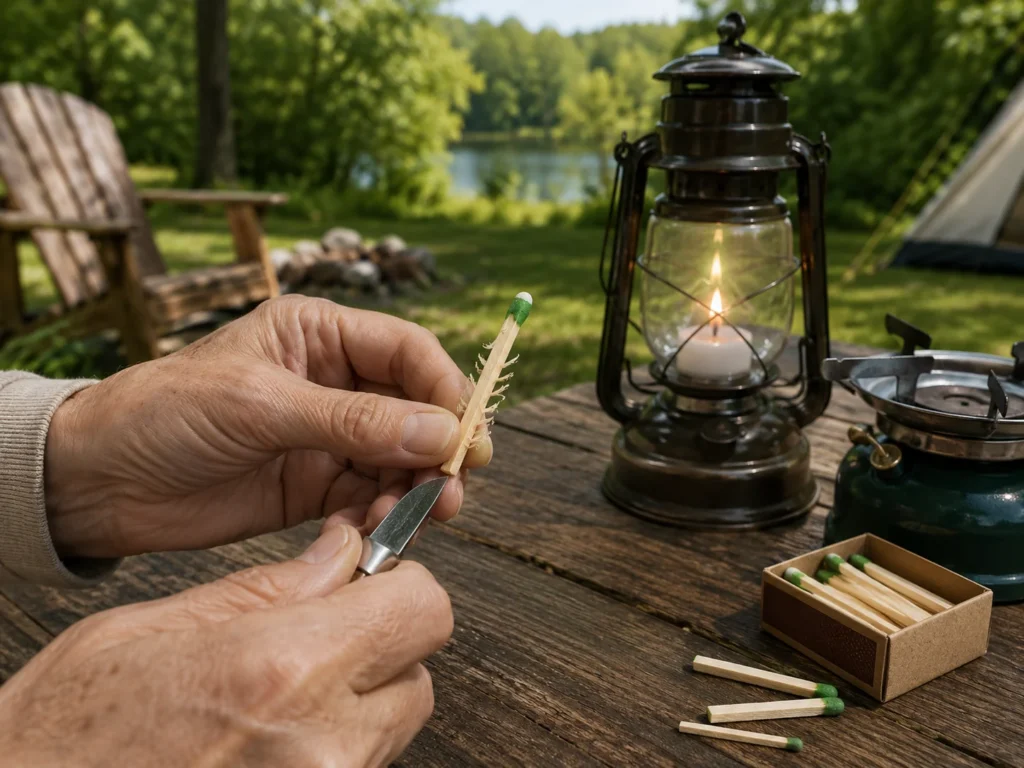
There is an old technique sometimes called feathering. Before lighting the match, use a small knife to make a few shallow cuts down the wooden shaft. Leave the thin curls attached and keep well away from the match head. The wooden feathers catch the flame and help it last. This simple change gives you more time to light a candle, stove, or prepared campfire without hurried, repeated attempts.
Handle the knife with care and always strike the match away from your body. Prepare the match in daylight on a stable surface. Cut away from your hands, and skip the trick if your eyesight or grip makes knife work uncertain. Use it outdoors only where flames are permitted. Clear away dry grass and keep water nearby. Never hold the match close to clothing, hair, or your face. Prepare several at home and store them dry. This little adjustment can save you a whole box of matches on a windy evening, whether you’re lighting a barbecue, an outdoor candle, or a fire pit with friends. It’s a small change with a surprisingly reliable payoff, straight from the days before windproof lighters existed at every corner store.
The Salt Water Candle Trick
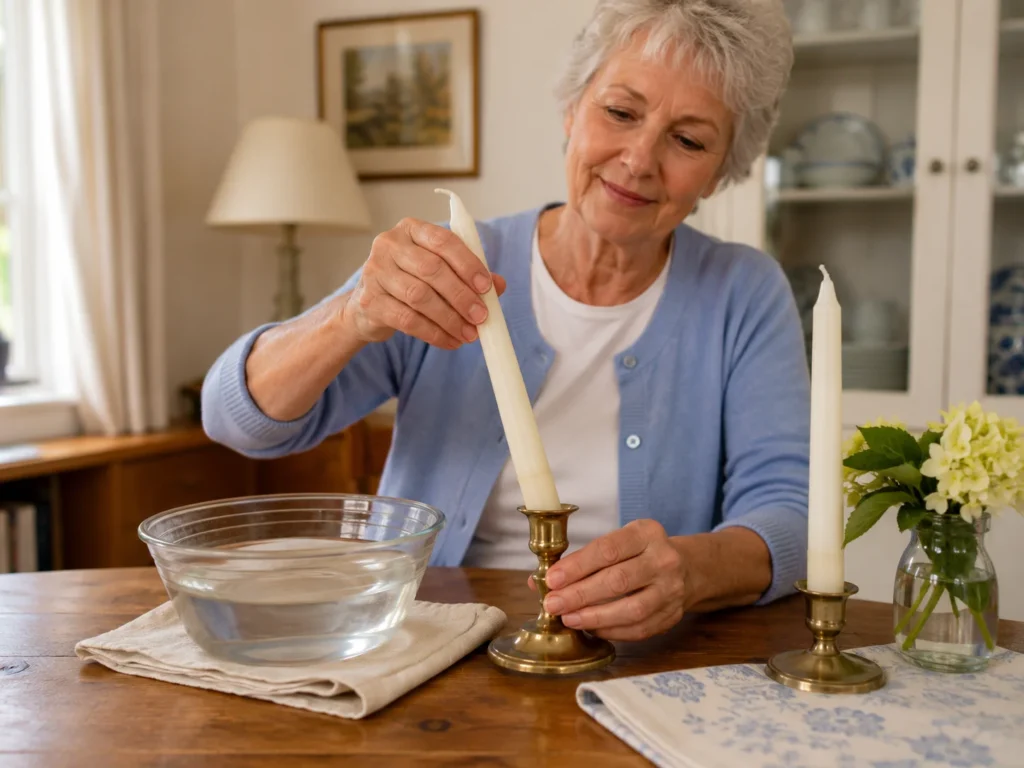
A taper candle that is slightly too wide for its holder can become an irritating little problem. Shaving the base with a knife creates a mess and can leave an uneven candle that leans. For tired hands, it is an unnecessary struggle. You can soften the lower end instead. Stand the candle base in hot water with some salt. Wait until the wax becomes slightly pliable. Remove it, dry it, and gently pinch or shape the softened base. Test it and make small adjustments until it fits securely without force or messy carving.
Do not ever soften the candle so much that the base collapses. Warm it gradually and keep the wick completely dry. Once fitted, check it from several angles. It must stand straight and remain firm when the holder is moved gently. If it wobbles, reshape it or choose another candle. Place the holder on a stable, heat-resistant surface, away from curtains, papers, pets, and busy walkways. Never leave a burning candle unattended. This old trick is useful because it changes the wax rather than forcing the holder. You get a neater fit with less cutting, less strain, and less waste. A forgotten cupboard candle becomes usable again.
This trick works best on plain wax candles, so it’s perfect for the everyday candles you keep around the house. Fewer replacements mean less spending at the store and more evenings enjoying that warm glow. Try it with your next batch before lighting a single wick, and notice just how much longer your favorite candles last around the table.